Centos6.4 openldap的搭建(二)
前面已经用一篇博文将ldap是什么了,这里记录一下openldap的搭建。
一、服务器端的安装:
1.1 像系统时间同步,关闭selinux和防火墙就不写了。
1.2 yum安装相关的软件
# yum install openldap openldap-servers openldap-devel openldap-clients -y
1.3 创建openldap的数据库配置文件
# cp /usr/share/openldap-servers/DB_CONFIG.example /var/lib/ldap/DB_CONFIG
# chown ldap:ldap /var/lib/ldap/DB_CONFIG
1.4 将openldap的配置文件模板拷贝到/etc/openldap/目录下
# cp /usr/share/openldap-servers/slapd.conf.obsolete /etc/openldap/slapd.conf
1.5 创建ldap登录密码
# slappasswd #这是生成密码的命令
New password: #输入密码
Re-enter new password: #输入密码
{SSHA}+7CKA7piTkQYg0/QkXdgKGLhNrzz9kda #这是加密后的密码,我这里的密码为123456
1.6 修改ldap的主配置文件
# vi /etc/openldap/slapd.conf
by dn.exact="cn=Manager,dc=51niux,dc=com" read #107行,将dc=改为我们自己要设置的域
suffix "dc=51niux,dc=com" #115行,dc=改为要设置的域
rootdn "cn=Manager,dc=51niux,dc=com" #117行也要进行修改
rootpw {SSHA}+7CKA7piTkQYg0/QkXdgKGLhNrzz9kda #123行新添加这样一段,就是将我们加密的密码添加进来
1.7 添加openldap日志功能
# vi /etc/openldap/slapd.conf
loglevel 296 #在第五行新添加一条,设置日志级别,296级别是由256(日志连接/操作/结果)、32(搜索过滤器处理)、8(连接管理)累加的结果。
# vi /etc/rsyslog.conf
local4.* /var/log/ldap.log #在63行添加一条
# touch /var/log/ldap.log
# chown ldap:ldap /var/log/ldap.log
1.8 删除/etc/openldap/slapd.d/目录下一些旧的配置文件,重新建立
# rm -rf /etc/openldap/slapd.d/*
#chown -R ldap:ldap /etc/openldap/
# /etc/init.d/slapd restart
# chown -R ldap:ldap /var/lib/ldap/
# slaptest -f /etc/openldap/slapd.conf -F /etc/openldap/slapd.d/
#chown -R ldap:ldap /etc/openldap/
# /etc/init.d/slapd restart
1.9 查看slapd启动状态
# ps -aux|grep ldap #说明已经启动
Warning: bad syntax, perhaps a bogus '-'? See /usr/share/doc/procps-3.2.8/FAQ
ldap 7255 0.0 4.9 546520 50152 ? Ssl 00:09 0:00 /usr/sbin/slapd -h ldap:/// ldapi:/// -u ldap
# netstat -lntup|grep :389 #查看端口已经启动
tcp 0 0 0.0.0.0:389 0.0.0.0:* LISTEN 7255/slapd
tcp 0 0 :::389 :::* LISTEN 7255/slapd
1.10 下载ldap辅助工具migrationtools并配置
# yum install migrationtools -y
# vim /usr/share/migrationtools/migrate_common.ph #找到下面的两句话进行修改
$DEFAULT_MAIL_DOMAIN = "51niux.com";
$DEFAULT_BASE = "dc=51niux,dc=com";
1.11 创建用户用户组并导入到openldap的库中
# ldapsearch -x -b "dc=51niux,dc=com" -LLL #查询一下openldap里面有什么
No such object (32) #这是没有对象的提示
# useradd ldaptest1
# useradd ldaptest2
# grep ldaptest* /etc/passwd >/tmp/passwd
# grep ldaptest* /etc/group >/tmp/group
# cd /usr/share/migrationtools/
# ./migrate_base.pl >/tmp/base.ldif
# ./migrate_passwd.pl /tmp/passwd >/tmp/passwd.ldif
# ./migrate_group.pl /tmp/group >/tmp/group.ldif
# ldapadd -x -D "cn=Manager,dc=51niux,dc=com" -w 123456 -f /tmp/base.ldif
adding new entry "dc=51niux,dc=com"
adding new entry "ou=Hosts,dc=51niux,dc=com"
adding new entry "ou=Rpc,dc=51niux,dc=com"
adding new entry "ou=Services,dc=51niux,dc=com"
adding new entry "nisMapName=netgroup.byuser,dc=51niux,dc=com"
adding new entry "ou=Mounts,dc=51niux,dc=com"
adding new entry "ou=Networks,dc=51niux,dc=com"
adding new entry "ou=People,dc=51niux,dc=com"
adding new entry "ou=Group,dc=51niux,dc=com"
adding new entry "ou=Netgroup,dc=51niux,dc=com"
adding new entry "ou=Protocols,dc=51niux,dc=com"
adding new entry "ou=Aliases,dc=51niux,dc=com"
adding new entry "nisMapName=netgroup.byhost,dc=51niux,dc=com"
# ldapadd -x -D "cn=Manager,dc=51niux,dc=com" -w 123456 -f /tmp/passwd.ldif
adding new entry "uid=ldaptest1,ou=People,dc=51niux,dc=com"
adding new entry "uid=ldaptest2,ou=People,dc=51niux,dc=com"
# ldapadd -x -D "cn=Manager,dc=51niux,dc=com" -w 123456 -f /tmp/group.ldif
adding new entry "cn=ldaptest1,ou=Group,dc=51niux,dc=com"
adding new entry "cn=ldaptest2,ou=Group,dc=51niux,dc=com"
# ldapsearch -x -b "dc=51niux,dc=com" -LLL #再次查询就有数据了
博文来自:www.51niux.com
二、 安装phpldapadmin管理ldap
2.1 安装lamp环境
# yum install httpd httpd-devel httpd-manual mod_ssl mod_perl mod_auth_mysql mysql mysql-server mysql-dev php php-mysql gd php-gd gd-devel php-xml php-common php-mbstring php-ldap php-pear php-xmlrpc php-imap
2.2 下载phpldapadmin并安装
# wget https://sourceforge.net/projects/phpldapadmin/files/phpldapadmin-php5/1.2.2/phpldapadmin-1.2.2.tgz --no-check-certificate
# tar zxf /tools/phpldapadmin-1.2.2.tgz
# cd phpldapadmin-1.2.2/config/
# cp config.php.example config.php
# cd /var/www/html
# mv /tools/phpldapadmin-1.2.2 phpldapadmin
2.3 修改phpldapamin配置文件
# vim /var/www/html/phpldapadmin/config/config.php
$servers->setValue('server','host','127.0.0.1');
$servers->setValue('server','port',389);
$servers->setValue('server','base',array('dc=51niux,dc=com'));
$servers->setValue('login','auth_type','session');
$servers->setValue('login','bind_id','cn=Manager,dc=51niux,dc=com');
$servers->setValue('login','bind_pass','123456');
$servers->setValue('server','tls',false);
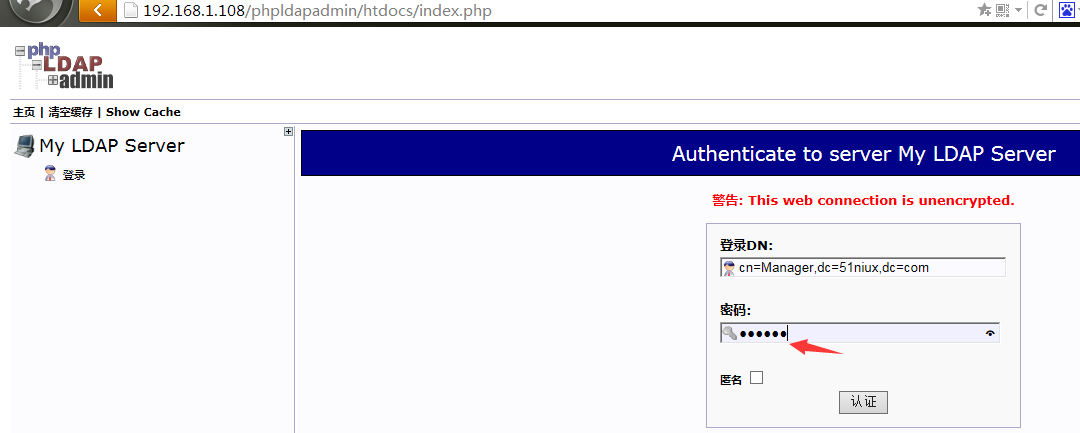
2.4 启动httpd 并登陆验证
# /etc/init.d/httpd restart

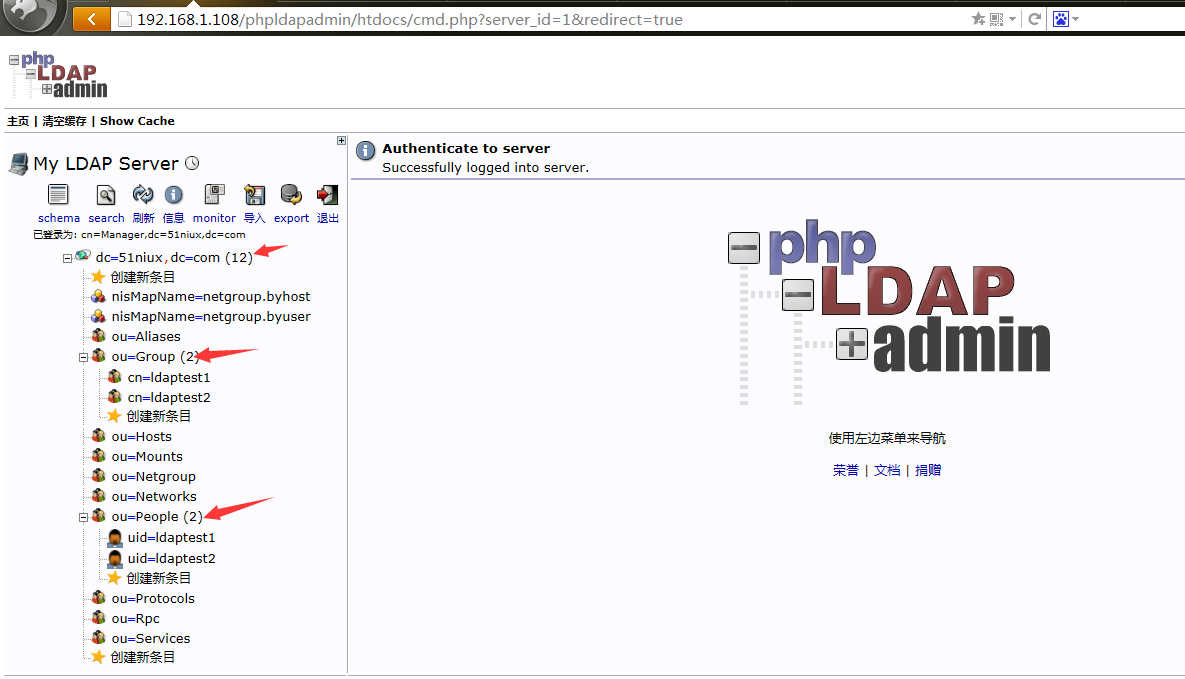
跳转到下面的界面说明我们登陆成功:

博文来自:www.51niux.com
三、安装ldap-account-manager管理openldap,跟上面功能相同。
# wget https://sourceforge.net/projects/lam/files/LAM/4.6/ldap-account-manager-4.6.tar.bz2 --no-check-certificate
# tar jxf ldap-account-manager-4.6.tar.bz2
# cp -rf /tools/ldap-account-manager-4.6 /var/www/html/ldap
# cd /var/www/html/ldap/
# cp config/config.cfg_sample config/config.cfg
# cp config/lam.conf_sample config/lam.conf
# sed -i 's#dc=my-domain#dc=51niux#g' config/lam.conf
# sed -i "s#passwd:.*#passwd: {SSHA}+7CKA7piTkQYg0/QkXdgKGLhNrzz9kda#g" config/lam.conf #登录密码改为我们自己设置的密码,这里为123456
# sed -i "s#treesuffix: dc=yourdomain,dc=org#treesuffix: dc=51niux,dc=com#g" config/lam.conf
# chown -R apache.apache /var/www/html/ldap
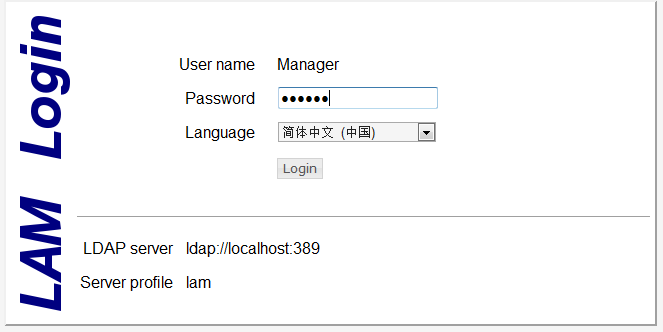
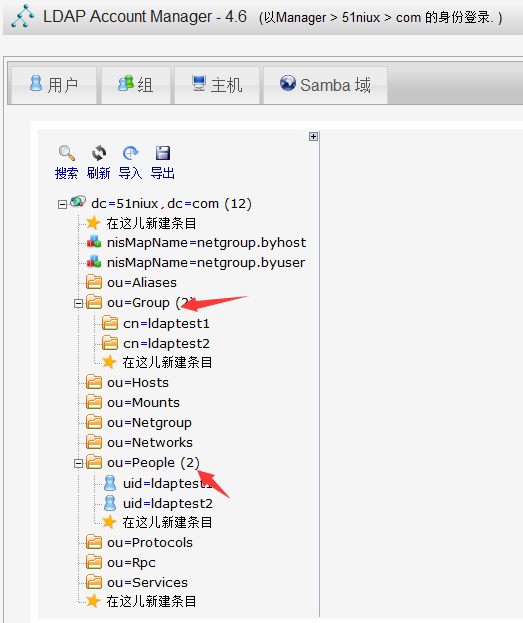
浏览器访问:http://web服务器的IP/ldap


增加用户等操作已测试完毕,可自行测试。
具体如何使用请参照官方文档:https://www.ldap-account-manager.org/static/doc/manual-onePage/index.html
注:ldap-account-manager-4.9开始,安装过程发生了变化,下面是变化后的安装过程,以ldap-account-manager-4.9为例。
#wget https://sourceforge.net/projects/lam/files/LAM/4.9/ldap-account-manager-4.9.tar.bz2 --no-check-certificate
#tar jxf ldap-account-manager-4.9.tar.bz2
#cd ldap-account-manager-4.9
#./configure --prefix=/var/www/html/lam/ --with-httpd-user=apache --with-httpd-group=apache --with-web-root=/var/www/html/lam/
#make install
#cd /var/www/html/lam
# cp config/config.cfg.sample config/config.cfg
# cp config/unix.conf.sample config/lam.conf #主要是这里,其实是config.cfg里面设置默认是lam,如果config.cfg里面default: lam改变成别的,我们就不需要lam文件了。
#sed -i 's#dc=my-domain#dc=51niux#g' config/lam.conf
#sed -i "s#passwd:.*#passwd: {SSHA}+7CKA7piTkQYg0/QkXdgKGLhNrzz9kda#g" config/lam.conf
#sed -i "s#treesuffix: dc=yourdomain,dc=org#treesuffix: dc=51niux,dc=com#g" config/lam.conf
# chown -R apache.apache /var/www/html/ldap
访问浏览器,就可以了,但是这里有一点要注意,4.9以后将配置文件分开了,所以我们这里只能看到用户和组,如果要想之前都能看到的话,要将配置文件合并或者将旧版本的lam.conf拷贝过来。

随便找一台linux客户端测试一下:
# ldapsearch -LLL -w 123456 -x -H ldap://192.168.1.111 -D "cn=Manager,dc=51niux,dc=com" -b "dc=51niux,dc=com" "(uid=ldaptest1)"
dn: uid=ldaptest1,ou=People,dc=51niux,dc=com
uid: ldaptest1
cn: ldaptest1
objectClass: account
objectClass: posixAccount
objectClass: top
objectClass: shadowAccount
userPassword:: e2NyeXB0fSEh
shadowLastChange: 17111
shadowMin: 0
shadowMax: 99999
shadowWarning: 7
loginShell: /bin/bash
uidNumber: 2535
gidNumber: 2535
homeDirectory: /home/ldaptest1
至此,openldap的简单搭建记录完毕。
